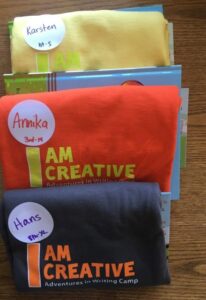
T-Shirt Prep at Check In Table (Task C)
Step 1: Open the t-shirt box and notice bundles. The bundles already have two shirts in them. Please leave them bundled as groups of 2 unless a REALLY unique situation arises!
Step 2: Arrange shirts alphabetically by grade level on the check in table. Lay the colors out on one side of the table in grade order (Yellow on the left, then red, then orange, then green, then Blue, then Slate Gray on the right)
- 1st Grade: Mouse Lemurs, **Yellow shirts**
- 2nd Grade: = Ruffed Lemurs, red shirts**
- 3rd Grade = Silky Lemurs, **orange shirts**
- 4th grade = Aye-Aye Lemurs, **green shirts**
- 5th grade Ringtail Lemurs, **blue shirts**
- Middle School: Grades 6-8, **slate gray shirts**
- Staff = (black ink, black shirts)
- t-shirts for AGs
- Polos for Rangers & Site Administrator
- Button nametags for all staff
Extra Shirts
Some families have ordered extra shirts. Once all of the shirts have been laid out, please go through and add extra shirts to the camper’s bundle.
Step 1: Obtain a copy of the Day 1 Roster
Step 2: Look at the “Shirts” columns. If there is a number entered, please add that number of single shirts (not bundles!) to the camper’s existing shirt bundle.
Step 3: Add a check-mark next to the camper’s name indicating that the extra items have been added to the standard bundle.
Step 4: Rock on!

